Painting kitchen cabinets can dramatically update your space without a full remodel. The key to painting cabinets like a pro is thorough preparation, choosing the right paint, and using proper techniques for a smooth, durable finish.
Start by cleaning, sanding, and priming the surfaces to ensure paint adhesion. Using a high-quality brush or sprayer and applying multiple thin coats will prevent drips and uneven texture.
With the right tools and steps, even a beginner can achieve professional-looking results. This guide breaks down each part of the process clearly for the best outcome.
Essential Tools and Materials
Proper preparation and the right equipment are critical for painting kitchen cabinets successfully. A blend of specialized supplies, appropriate paint products, and quality brushes or rollers ensures a smooth, lasting finish.
Must-Have Painting Supplies
Start with an all-purpose cleaner or degreaser to remove kitchen grime. After cleaning, use sandpaper (120- to 220-grit) to smooth surfaces and improve paint adhesion. A sanding block or an electric sander speeds this step.
You’ll need high-quality painter’s tape to protect edges and hardware. Use drop cloths or plastic sheeting to safeguard floors and countertops from drips.
For applying paint, have paint trays, stir sticks, and lint-free cloths on hand. Also, prepare screwdrivers or a drill to remove cabinet doors and hardware for easier access.
Selecting the Right Paint and Primer
Choose a high-quality primer designed for wood or laminate, depending on your cabinets’ material. Primers with adhesion properties reduce peeling and ensure durability.
Pick a semi-gloss or satin finish paint for cabinets. These finishes allow for easy cleaning and better resistance to moisture and grease. Avoid flat paints, as they are less durable in kitchen environments.
Water-based acrylic enamels are a good choice for durability and easy cleanup. Oil-based paints offer a smoother finish but require mineral spirits for cleaning.
Recommended Brushes and Rollers
Use high-quality synthetic brushes for water-based paints, typically 2 to 2.5 inches wide for cabinet surfaces. Angled brushes help with corners and detailed areas.
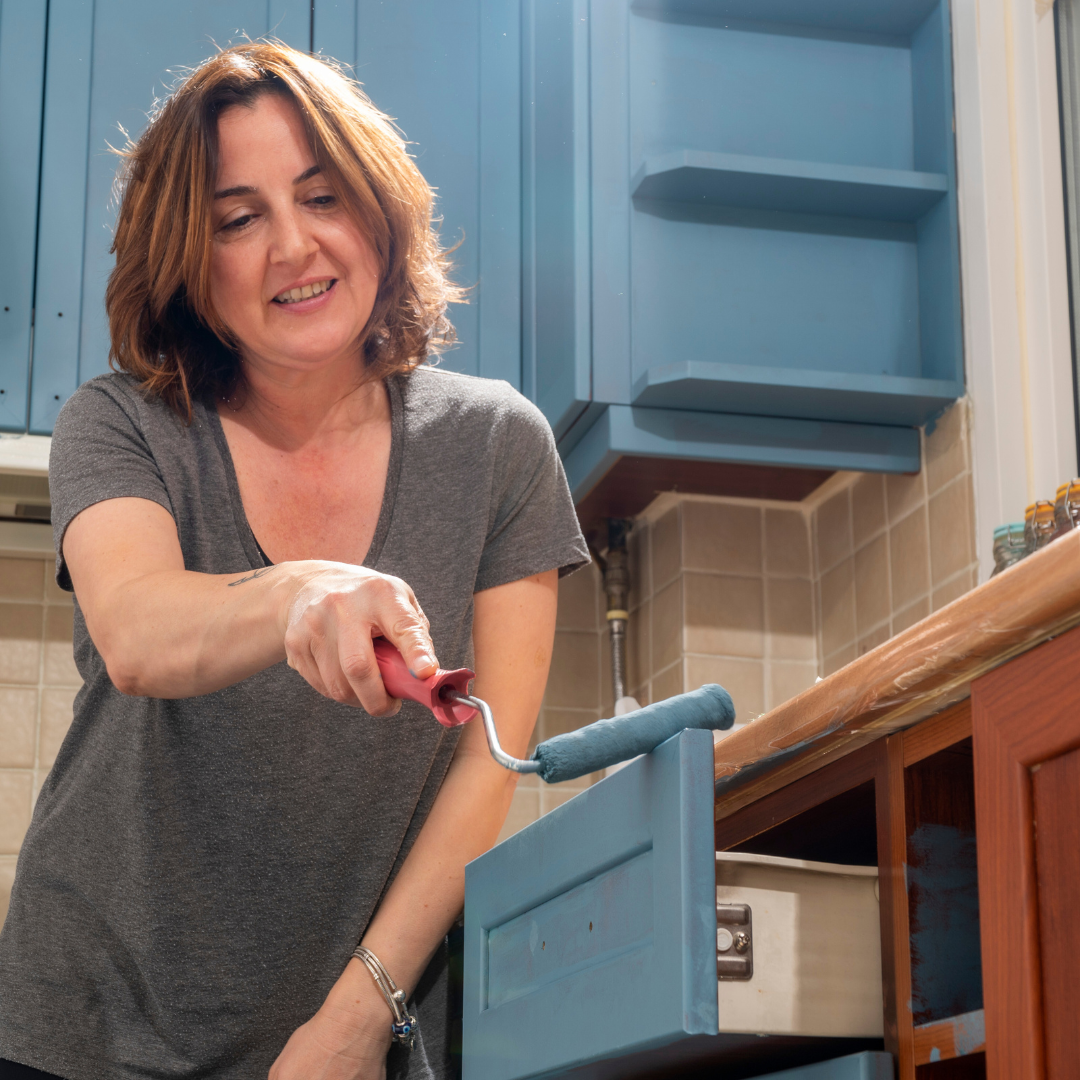
A small foam roller (4 to 6 inches) is ideal for applying paint evenly on flat panels without brush marks. Avoid large rollers as they may cause bubbles.
For detailed trim work, have a smaller artist’s brush ready. Clean brushes and rollers thoroughly after each use to maintain quality for multiple coats.
Preparation and Planning
Preparing your kitchen cabinets before painting requires careful attention to detail and organization. Proper assessment, workspace setup, hardware removal, and thorough cleaning form the foundation for a smooth painting process and durable finish.
Assessing Cabinet Condition
Start by inspecting cabinets for damage such as cracks, dents, or loose joints. Identify any areas that need repair or sanding. Check for peeling or flaking paint, which must be completely removed to ensure adhesion.
Evaluate the type of cabinet material—solid wood, MDF, or laminate—as this affects your prepping method and primer choice. Note any stains or water damage, as these may require special primers or fillers.
Making repairs early prevents issues during painting. Sand rough areas with medium-grit sandpaper for a smooth surface, then wipe away dust to avoid imperfections.
Creating a Workspace
Choose a well-ventilated area with good lighting to work safely and efficiently. Protect floors and countertops with drop cloths or plastic sheeting to catch paint drips and dust.
Set up tables or sawhorses to lay cabinet doors flat. Arrange tools, paint, sandpaper, and cleaning supplies nearby for easy access. If possible, keep children and pets away from the workspace to avoid distractions and accidents.
Organizing the area in advance saves time. Clear clutter so you can move freely while working on multiple cabinet parts.
Removing Hardware and Doors
Remove all cabinet doors, drawers, and hardware, including knobs, handles, and hinges. Use a screwdriver appropriate for the fasteners to avoid damage. Label doors and hardware using masking tape and a numbering system to ensure easy reassembly.
Take photos of the original setup if needed for reference. Store screws and small parts in labeled containers to prevent loss.
Removing these elements allows for complete, even paint coverage and prevents accidental paint on hardware. It also facilitates sanding and cleaning of all cabinet surfaces.
Surface Cleaning and Degreasing
Thoroughly clean cabinets to remove grease, dirt, and residues that block paint adhesion. Use a degreaser or trisodium phosphate (TSP) solution following the manufacturer’s instructions.
Clean all surfaces with a sponge or cloth, paying special attention to areas near the stove and handles. Rinse with clean water and allow to dry completely.
Avoid oil-based soaps as they leave residues. Proper surface preparation reduces peeling and bubbles in the paint finish.
Cabinet Surface Preparation
Proper preparation determines the quality and durability of your paint job. This involves smoothing surfaces, fixing imperfections, and removing all dust and residue to ensure the paint adheres correctly.
Sanding Techniques for a Smooth Finish
Start sanding with 120-grit sandpaper to remove the existing finish or rough patches. Use a sanding block or a palm sander for flat surfaces to maintain even pressure.
After the initial sanding, switch to 220-grit sandpaper for a fine finish that lets primer and paint bond well. For intricate details, sand gently by hand to avoid damage.
Always sand in the direction of the wood grain to prevent scratches. Avoid over-sanding, which can create uneven surfaces.
Filling Holes and Repairs
Inspect cabinets for nail holes, dents, or cracks. Use a high-quality wood filler or putty for repairs.
Apply filler with a putty knife, pushing it firmly into holes and gaps. Let it dry as per product instructions, usually between 20 minutes and an hour.
Once dry, sand the filled areas smooth with 220-grit sandpaper to match the cabinet surface. Repeat filling and sanding if necessary for larger imperfections.
Dust and Residue Removal
After sanding and repairs, remove all dust thoroughly. Start with a vacuum cleaner using a brush attachment to lift particles from crevices.
Wipe surfaces using a damp microfiber cloth or a tack cloth to capture fine dust. Avoid using cleaners that leave residues or oils on the surface.
Ensure cabinets are completely dry before applying primer or paint to prevent adhesion issues.
Priming Cabinets Properly
Priming kitchen cabinets is essential to ensure paint adhesion, durability, and a smooth finish. Selecting the right primer, applying it evenly, and allowing proper drying time are critical steps to achieve professional results.
Choosing an Effective Primer
Use a primer formulated specifically for cabinets or wood surfaces. Oil-based primers are excellent at blocking stains and providing strong adhesion. However, water-based (latex) primers dry faster and have less odor.
If your cabinets have glossy finishes or are made of laminate, a bonding primer is necessary to promote paint adhesion. For surfaces with knots or tannin bleed, a stain-blocking primer prevents discoloration.
Key factors to consider:
| Feature | Primer Type | Benefit |
| Adhesion | Bonding primer | Ensures paint sticks well |
| Stain Blocking | Oil-based primer | Prevents tannin bleed |
| Fast Drying | Water-based primer | Reduces project time |
Application Tips for Even Coverage
Clean cabinets thoroughly before priming, removing grease and dirt with a degreaser. Sand lightly with fine-grit sandpaper (220 grit) to create texture.
Use a high-quality synthetic brush or a foam roller for smooth primer application. Apply thin, even coats to avoid drips and uneven surface build-up. Paint in the direction of the wood grain for a consistent finish.
Allow primer to dry between coats if applying multiple layers. Avoid heavy brush strokes or over-brushing, which can leave marks.
Drying and Curing Recommendations
Primer drying time can vary by type and environment. Generally, water-based primers dry to the touch within 30-60 minutes, while oil-based types take 6-8 hours.
After drying, allow the primer to cure fully before sanding or painting. Curing can take 24-48 hours, depending on humidity and temperature. Insufficient curing may lead to peeling or uneven topcoat adhesion.
Keep the workspace well-ventilated and maintain a stable temperature to improve drying consistency. Lightly sand primed surfaces with 220-grit sandpaper before applying paint to ensure smoothness.
Painting Techniques for a Flawless Finish
Choosing the right method and applying paint correctly are key to achieving smooth, even coverage. Proper layering and minimizing imperfections can greatly improve the appearance of kitchen cabinets.
Brushing vs. Rolling vs. Spraying
Brushing offers control and is ideal for detailed areas like corners and edges. Use a high-quality synthetic bristle brush for water-based paints to reduce brush marks.
Rolling works well on flat surfaces, providing an even coat with fewer streaks than brushing alone. Opt for a small foam roller designed for smooth finishes.
Spraying delivers the fastest and most uniform coverage but requires preparation to avoid overspray. It’s best for professionals or experienced DIYers with proper ventilation and masking.
Applying Multiple Coats
Apply thin, even coats rather than one thick coat to prevent drips and uneven texture. Allow each coat to dry fully before lightly sanding with fine-grit sandpaper (220 grit) to smooth imperfections.
Two to three coats are usually necessary to achieve full coverage and durability. Avoid rushing between coats to ensure proper adhesion and a lasting finish.
Avoiding Brush Marks and Drips
Use a high-quality brush or roller to reduce brush marks and drips. Avoid pressing too hard, which can cause paint to puddle and drip.
Maintain a wet edge by working quickly and blending each stroke into the next. Check for drips immediately and smooth them out before the paint dries.
Proper thinning of the paint, following manufacturer guidelines, can also help achieve a smooth finish.
Reassembling and Detailing
This phase involves putting everything back precisely and fixing minor imperfections to ensure a professional finish. Proper steps in hardware installation, touch-ups, and final checks help maintain durability and appearance.
Reinstalling Hardware and Doors
Begin by attaching hardware such as knobs and handles securely. Use the original screws if possible, or choose replacements of the same size to avoid damaging the cabinet surface.
When re-hanging doors, align the hinges carefully to prevent gaps or uneven positioning. Adjust hinge screws until the doors open smoothly and sit flush with the cabinet frame. Test each door’s movement to ensure consistent alignment.
Labeling doors and hardware during disassembly speeds up this process. Confirm all parts go back to their original spots to avoid a mismatch or damage.
Touch-Up Procedures
Examine the cabinets for small chips, drips, or thin coverage areas. Use a fine brush to apply touch-up paint or primer sparingly on these spots.
Allow touch-ups to dry thoroughly before applying a second layer to avoid uneven texture. Sand lightly with fine-grit sandpaper between coats for a smooth surface.
Clean any paint smudges on hardware or adjacent surfaces immediately with a damp cloth to prevent permanent marks.
Final Inspection and Cleaning
Carefully inspect all cabinet surfaces under good lighting. Look for inconsistencies in paint texture, missed areas, or loose hardware.
Tighten any screws that may have loosened during reassembly. Clean up dust, fingerprint marks, or any remaining residue using a microfiber cloth and gentle cleaner.
Opening and closing every door and drawer confirms stable operation. This final step ensures the cabinets are both visually and functionally ready.
Maintaining Painted Kitchen Cabinets
Proper ongoing care preserves the finish and keeps your cabinets looking fresh. Focus on gentle cleaning methods and preventative measures to minimize damage over time.
Cleaning and Care Guidelines
Use a soft cloth or sponge with mild soap and warm water for regular cleaning. Avoid abrasive scrubbers or harsh chemicals, as they can dull or chip the paint.
Wipe spills immediately, especially oil or acidic substances like lemon juice or vinegar. For tougher stains, a mixture of baking soda and water applied gently can be effective.
Dry the surface thoroughly after cleaning to prevent moisture damage. Schedule deep cleanings monthly to remove grease build-up that soft cloths miss.
Protecting Against Wear and Tear
Install door bumpers or felt pads inside cabinet doors to prevent chipping from slamming. Use handles or knobs to avoid direct finger contact with painted surfaces.
Limit exposure to heat and moisture by using exhaust fans and addressing leaks promptly. Reapply a clear topcoat every few years to maintain durability and resist scratches.
Be mindful when placing heavy or sharp objects inside cabinets to avoid dents. Address minor touch-ups early with matching paint to keep the finish uniform.
Troubleshooting Common Problems
Addressing issues like peeling paint or uneven coverage quickly prevents further damage and ensures a smooth, professional finish. Proper surface prep and application techniques are key to resolving these common problems.
Dealing with Peeling or Chipping Paint
Peeling or chipping often results from poor adhesion or insufficient surface preparation. Start by scraping off all loose paint using a putty knife or scraper. Sand the area smooth with fine-grit sandpaper to create a uniform surface.
Clean the surface thoroughly with a degreaser or mild soap and water to remove dirt, oils, or residue. Allow it to dry completely before proceeding. Applying a quality primer designed for cabinets improves paint adhesion and prevents future peeling.
Use thin, even coats of paint and let each layer dry fully before adding the next. Avoid painting over dirty or greasy surfaces, as this weakens the bond and leads to chipping.
Fixing Uneven Coverage
Uneven coverage usually occurs when paint is applied too thickly or without adequate stirring. Stir paint well before and during use to ensure color and consistency are even throughout.
Use a high-quality brush or roller suited for cabinet paint. Apply thin coats rather than thick ones; this helps prevent drips and brush marks. Maintain a wet edge by overlapping strokes to avoid lap marks.
If uneven patches appear, lightly sand the dry surface with fine-grit sandpaper, then wipe clean before applying an additional coat. Multiple thin coats produce the most uniform finish compared to a single heavy coat.
Inspiration and Design Ideas
Choosing the right color and finish for your kitchen cabinets sets the tone for the entire space. Neutral shades like white, gray, and beige offer a timeless look that pairs well with most kitchen styles. For a bolder statement, consider deep navy or forest green to add depth and character.
Matte and satin finishes provide a modern, understated feel, while semi-gloss and gloss finishes can highlight architectural details and resist stains better. Mixing finishes is also popular—for example, matte cabinets with glossy island accents.
Here’s a quick table of popular color trends and their typical kitchen styles:
| Color | Style | Effect |
| White | Classic, Modern | Bright, clean, versatile |
| Navy Blue | Contemporary | Bold, sophisticated |
| Soft Gray | Transitional | Calm, subtle |
| Forest Green | Rustic, Modern | Earthy, unique |
| Black | Industrial | Sleek, dramatic |
Hardware choice further impacts the design. Matte black pulls suit modern kitchens; brass or gold tones add warmth to traditional or vintage looks. Remember to coordinate cabinet color with your countertops and backsplash for a cohesive appearance.
Combining paint techniques, like distressing or glazing, can add texture and interest. These methods work best on wood cabinets, enhancing character without overpowering the space.